Linux
Popular desktop distributions (e.g. Ubuntu) allow for graphical configuration of network interfaces using NetworkManager. Installation of additional packages allows it to manage OpenVPN connections as well.
On Ubuntu the required package is named network-manager-openvpn and can be installed using:
sudo apt-get install network-manager-openvpn
Depending on the distribution the network-manager-openvpn-gnome package might need to be installed as well (this instruction is based on a standard desktop distribution of Ubuntu 22.04):
sudo apt-get install network-manager-openvpn-gnome
You need OpenVPN version 2.4.6 or newer (AES-GCM cipher support)
This guide requires downloading of the VPN configuration file from the WMI account panel.
Open the network configuration window: 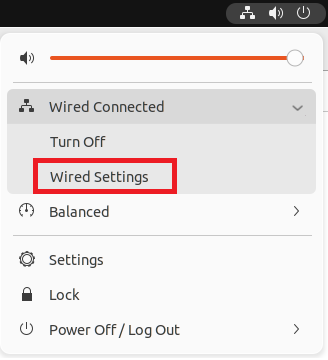
Add a new VPN connection: 
by importing the previously downloaded configuration file: 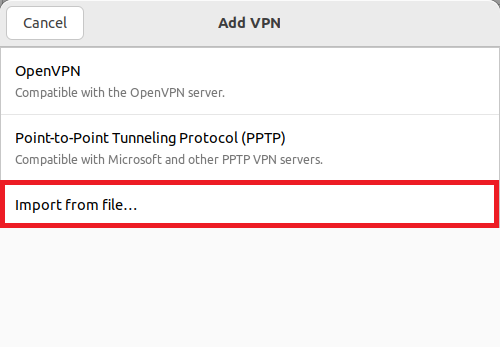
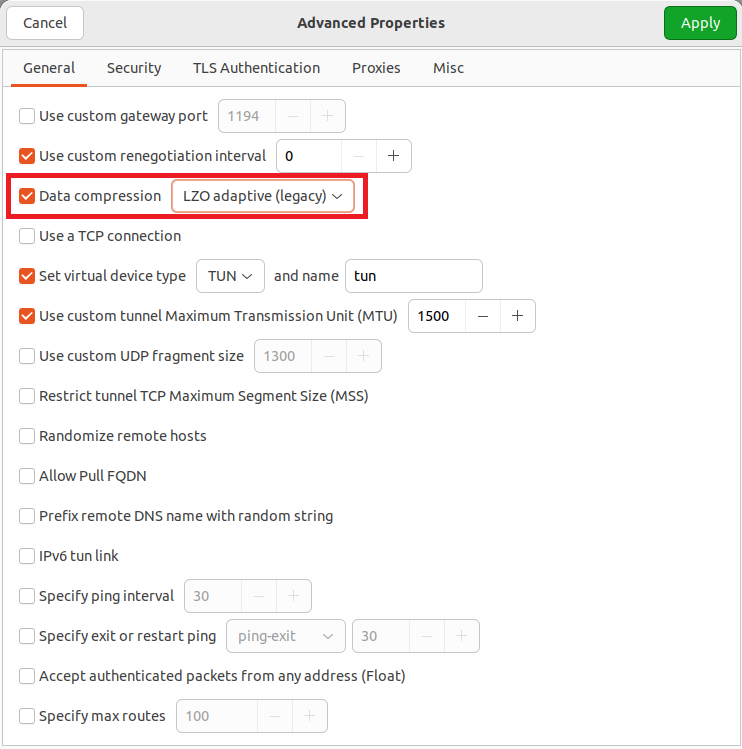
Next, enter your credentials. For VPN connection to operate properly it is also necessary to set some advanced options: 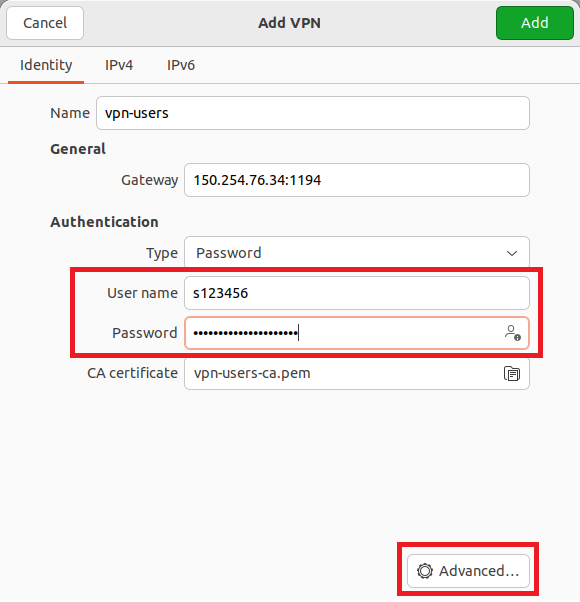
VPN packets are not routed outside of faculty's network, therefore limit use of VPN connection only for internal resources in the IPv4 submenu of routes settings: 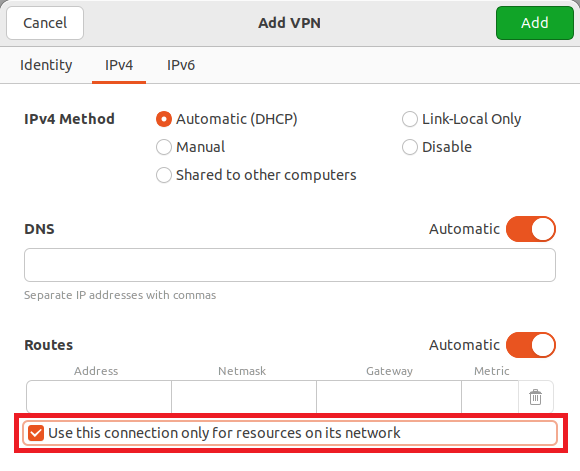
Similarly configure IPv6.
To launch the configured VPN connection use the network connection list: 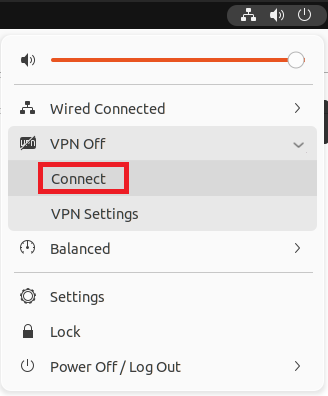
Some versions of NetworkManager have problems with saving advanced TLS configuration. This issue will prevent the VPN connection from properly working after the first successful connection is made.
The solution is to reconfugre the TLS Authentication section in the Advanced Properties:

The key file is located in a hidden directory .cert/nm-openvpn located in the user's home directory. In order to show such folders you need to select the appropriate option from the context menu visible after right-clicking with your mouse on an empty space in the file view window.